The idea behind this part of the course was to quickly draw different angles of your face and head, and then do a longer drawing of your head. Having done this I am now seriously considering plastic surgery! None of the drawings really look like me, and I've found that it is really hard to look at the drawing and see what is wrong with it, when it is your own features you are considering.
Friday, 24 February 2012
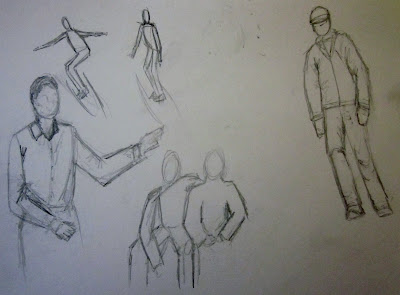
Project - The moving figure
For this next part of the course the idea was to keep a sketch book with you and draw people out and about. We were to catch fleeting moments and do some people watching. This is an ongoing project to build up a resource for future work. Here are some of my initial attempts.
Monday, 20 February 2012
Project - The Clothed Figure
To start with, we were asked to do some sketching of fabric which had been draped across a chair. This was to look at line and form, and be done in charcoal or soft pencil.
In my second drawing, I think you get a sense of the baggy clothing with the model in a slouched position.
The next stage was an exercise in form and movement in a clothed figure. Observing how the fabric helps and even exaggerates the movement of the figure.
I'm not sure I really captured this in my drawings. In the first one, although my model has a blanket over her legs, it actually looks like her legs are not in proportion to her top half and the pose looks a little awkward.
Friday, 10 February 2012
Exercise: Three drawings
The idea behind this exercise was to do three drawings, using different materials, and to do one sitting, one standing and one lying down pose. Also, to note the centre of gravity, and angles of limbs and look for any foreshortening.
My first sketch was a standing pose. I did two drawings, one using white chalk on black paper. This came out surprisingly well considering I was using a jumbo stick of chalk!
The second drawing was done using black and red coloured pencils. I'm not sure about the proportions on either of these as the body seems to be leaning back a bit too far, and the feet are too small.
The next drawing was a seated pose. I did a warm up exercise of zig-zagging from point to point which actually turned out better than the longer drawing. Then a quick sketch in pencil, before the final drawing in oil pastels. These could be my most hated drawing material, but I thought I would give them another chance. Sadly, the drawing was a disappointment, but I think that was something to do with my proportions again, rather than the tools.
 |
| Zig-zagging exercise |
 |
| Quick pencil sketch |
My third drawing was a lying down pose. This I tried in charcoal, and also a large felt tip pen with a sort of brush nib to it.
Tuesday, 7 February 2012
Research Point- Structure
Whilst on the subject of anatomical drawings, I had to include this picture of a drawing by Roberto Osti who is an American artist. This really does set the imagination soaring!
Project - Structure
 |
| Drawing by Andreas Vesalius |
 |
| Drawings by Leonardo da Vinci |
I then tried my hand at some anatomical drawing using black and red pencil.
(The red doesn't really show up in picture)
Also I copied a skeleton drawing by Bernard Siegfried Albinus. I used a black biro and was quite pleased with him. His arms may be a little on the long side but he doesn't seem to mind!
Subscribe to:
Posts (Atom)


