Wednesday, 25 April 2012

Assignment Four- Research Point


RESEARCH POINT- Investigate some artists self-portraits.  Look at both well-known and lesser known artists.


I started off by looking at one of the self-portraits of Vincent van Gogh.


This was an oil painting entitled ‘Self-portrait with a felt hat’. Painted in 1888, in the impressionistic style, this portrait may have been painted for many reasons: To mark a moment in time, to try out various painting techniques and to improve his skills as an artist. Also it might have been easier to paint oneself rather than to pay a model for their time, if funds were short.  The pose is one of thoughtfulness and concentration with his gaze slightly over to one side, and muted colours are used throughout.

---------------------------------------------------------------------------------------------------------

The next artist I chose to look at is; Lucian Freud (1922 – 2011).  He was one of the most important and influential artists of his generation, and the paintings he made of people were central to his work.   He was quoted to have said, 'I've always wanted to create drama in my pictures, which is why I paint people. It's people who have brought drama to pictures from the beginning. The simplest human gestures tell stories.'

You can clearly see the drama in every brushstroke of his self-portrait.  Every plane of his face is filled with expressive colours and contours, bringing the portrait to life.  He is thought to have worked for many hours on each painting, building up thick layers of paint to create a three dimensional effect to his work.


Image Detail
---------------------------------------------------------------------------------------------------------

This next drawing is a self-portrait drawn by artist Paul Rodecker. It was posted on his drawing blog in 2009.  He used a number of thin black sharpies and the effect is seriously intense, with the gaze almost daring you to blink. 

Image Detail

---------------------------------------------------------------------------------------------------------

This next painting was entitled ‘Self-portrait with easel’ by Gustave Caillebotte (August 19, 1848-February 21, 1894). He was a French painter and a member of the group of artists known as Impressionists.  What is interesting about his self-portrait is the way the artist is obviously looking in a mirror to paint the picture.  Apparently he was not left handed, yet in the painting he is clearly seen holding the brush in his left hand.

---------------------------------------------------------------------------------------------------------

The last artist I will look at is Norman Rockwell.   He was born in 1894 and produced over 4,000 original works in his lifetime.  Alongside his paintings he was also an illustrator, and was commissioned to illustrate over 40 books. 

The painting entitled ‘Triple self-portrait’ was a chance for Rockwell to reveal something of his character and profession.  This he does by the pose of viewing himself in a mirror, surrounded by items of his trade; easel, pallet, canvas, brushes and a full waste bin.  The image on the canvas is incomplete, in black and white, and clearly not giving too much clarity to the artists’ image of himself.  The image in the mirror is even more intriguing. This time in full colour surrounded by a flashy gilt frame complete with American eagle. But, the eyes of the artist are hidden. Suggesting the artist is seeing a distorted image of himself, or hiding his inner soul from the viewer. The artist’s has signed the corner of the incomplete portrait rather that at the lower corner of the main painting.


Thursday, 29 March 2012

Assignment four- part 2

This is the second part of assignment four.  For this drawing we were to have our model in a reclining pose, and to focus on tone rather than line.  We were to explore the subject's pictorial possibilities and to use different tools for the preliminary drawings before deciding which to use in the final work.


My first drawing was done in black and white pastel on buff coloured paper.
 I then went on to do a coloured pastel drawing but again I think it lacked a strong contrast between light and shade.

For my third drawing I had a go at covering my paper with charcoal powder and then using a charcoal stick and a putty rubber draw in the figure.  I think this worked the best for a tonal drawing, and so decided on this medium for my final piece.


My final drawing was on A2 paper.  The proportion may be a little out, but I'm quite pleased with it.  It was a lot easier to draw my model asleep than to try and do detailed facial features with a charcoal stick.

Friday, 9 March 2012

Assignment four

This assignment is in two parts.  The first part is to do a drawing of a model in a seated position.  Allowing 2 hours for the completed drawing, we were to focus on line and shape rather than tone.  Some exploratory sketches were also required.

I started off by doing a couple of drawings using chalk.  For some reason I really like using this material.  I think it's something about the contrast of white on a solid black background.


I had to use myself as a model again, as nobody in my house would ever sit still for two hours, unless they were asleep!
  I decided that I would try another medium for my final piece which was drawn using brown ink and a dip pen.  I wasn't brave enough to just start drawing with the ink and I had to put in a few pencil lines to guide me.  I can't quite get the hang of the dip pen.  It either refuses to hold the ink or spills it all over the page.  This is the final drawing.  I must admit certain features are slightly off, like my skinny arms and tiny hands with too many fingers, but sadly I cannot use tippex!


Exercise - Portrait from memory

Using our imagination and skill already learnt, we were to draw someone we had momentarily seen, or a self portrait from memory.  I did some quick sketches of elements of my face, using dip pen and ink, and then proceeded to draw another self portrait, but this time without looking in a mirror.


Friday, 24 February 2012

Project - Self portrait

The idea behind this part of the course was to quickly draw different angles of your face and head, and then do a longer drawing of your head.  Having done this I am now seriously considering plastic surgery!  None of the drawings really look like me, and I've found that it is really hard to look at the drawing and see what is wrong with it, when it is your own features you are considering. 


Project - The moving figure

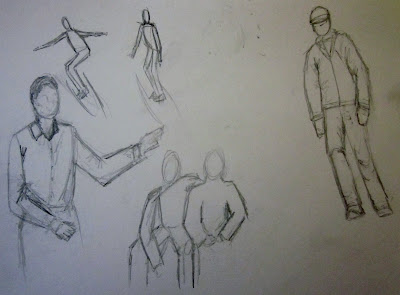
For this next part of the course the idea was to keep a sketch book with you and draw people out and about.  We were to catch fleeting moments and do some people watching.  This is an ongoing project to build up a resource for future work.  Here are some of my initial attempts.


Monday, 20 February 2012

Project - The Clothed Figure

To start with, we were asked to do some sketching of fabric which had been draped across a chair.  This was to look at line and form, and be done in charcoal or soft pencil.


The next stage was an exercise in form and movement in a clothed figure.  Observing how the fabric helps and even exaggerates the movement of the figure.
I'm not sure I really captured this in my drawings.  In the first one, although my model has a blanket over her legs, it actually looks like her legs are not in proportion to her top half and the pose looks a little awkward.


In my second drawing, I think you get a sense of the baggy clothing with the model in a slouched position.

Friday, 10 February 2012

Exercise: Three drawings

The idea behind this exercise was to do three drawings, using different materials, and to do one sitting, one standing and one lying down pose. Also, to note the centre of gravity, and angles of limbs and look for any foreshortening.

My first sketch was a standing pose.  I did two drawings, one using white chalk on black paper.  This came out surprisingly well considering I was using a jumbo stick of chalk!
The second drawing was done using black and red coloured pencils.  I'm not sure about the proportions on either of these as the body seems to be leaning back a bit too far, and the feet are too small.


The next drawing was a seated pose. I did a warm up exercise of zig-zagging from point to point which actually turned out better than the longer drawing. Then a quick sketch in pencil, before the final drawing in oil pastels. These could be my most hated drawing material, but I thought I would give them another chance. Sadly, the drawing was a disappointment, but I think that was something to do with my proportions again, rather than the tools.

Zig-zagging exercise
Quick pencil sketch


My third drawing was a lying down pose.  This I tried in charcoal, and also a large felt tip pen with a sort of brush nib to it. 


Tuesday, 7 February 2012

Research Point- Structure

Whilst on the subject of anatomical drawings, I had to include this picture of a drawing by Roberto Osti who is an American artist.  This really does set the imagination soaring!

Project - Structure

Drawing by Andreas Vesalius
In this part of the course we were asked to research anatomical drawings and try one out ourselves.  After looking in books and on the web I found some incredible images which shows how the artist has a good understanding of the structure of the body.
Drawings by Leonardo da Vinci
I then tried my hand at some anatomical drawing using black and red pencil.
 (The red doesn't really show up in picture)


Also I copied a skeleton drawing by Bernard Siegfried Albinus. I used a black biro and was quite pleased with him.  His arms may be a little on the long side but he doesn't seem to mind!


Wednesday, 25 January 2012

Project - Gesture

For this next exercise our model had to change pose every 2 to 5 minutes, and we were asked to draw quickly looking for the centre of gravity in each pose.


Next we had to look  at the energy of a pose.  This exercise asked for dynamic positions to be held for about five minutes.  We were to concentrate on the sense of energy and not to worry about the details.
I tried these exercises in ink and dip pen, felt tip, biro and oil pastels.


Sunday, 15 January 2012

Project - Form

This exercise was looking at the different shapes within the body and noticing and angles the body was making.

I then tried some exercises from a book I am reading called Life Drawing by Bridget Woods. 
 The exercises are called Rhythm and Curve and Circling, and help you to acheive better proportions by focusing on the larger shapes first and not fiddling with too much detail too soon.  This I need to work on!


Next I went on to do a series of drawings focusing on the three dimensional form. 
They were all supposed to be for ten minutes, but they all ran over time. This I think was partly due to  the fact that I felt my models liked to see some sort of attempt being made to make the drawing resemble them.  I could have left the faces blank, but once I had started it is very difficult to stop.  I somehow felt that with a bit more shading and then rubbing out, surely some of the lines would be in the right place and may hold some similarity to my model.  Alas, this isn't the case, but we are yet to come on to portraits so lets hope I have improved a little by then. At least my drawings raised a laugh from all my family members!